How to successfully build an online store from scratch using WordPress

If you're looking to build an online store from scratch, WordPress is a great platform to use. It's easy to use and set up, making it perfect for beginners. Here's how you can set up your first e-commerce website using WordPress:
Step 1: Choose a reliable Hosting Provider (Us of course)
To get started, you'll need to choose a hosting provider. There are many hosting providers out there, but we’re month-to-month, reliable and affordable. Starting up is super easy using our website. You can click on our main website, https://www.afrihost.com/, and navigate to view packages and select the Silver Linux.
Step 2: Install WordPress
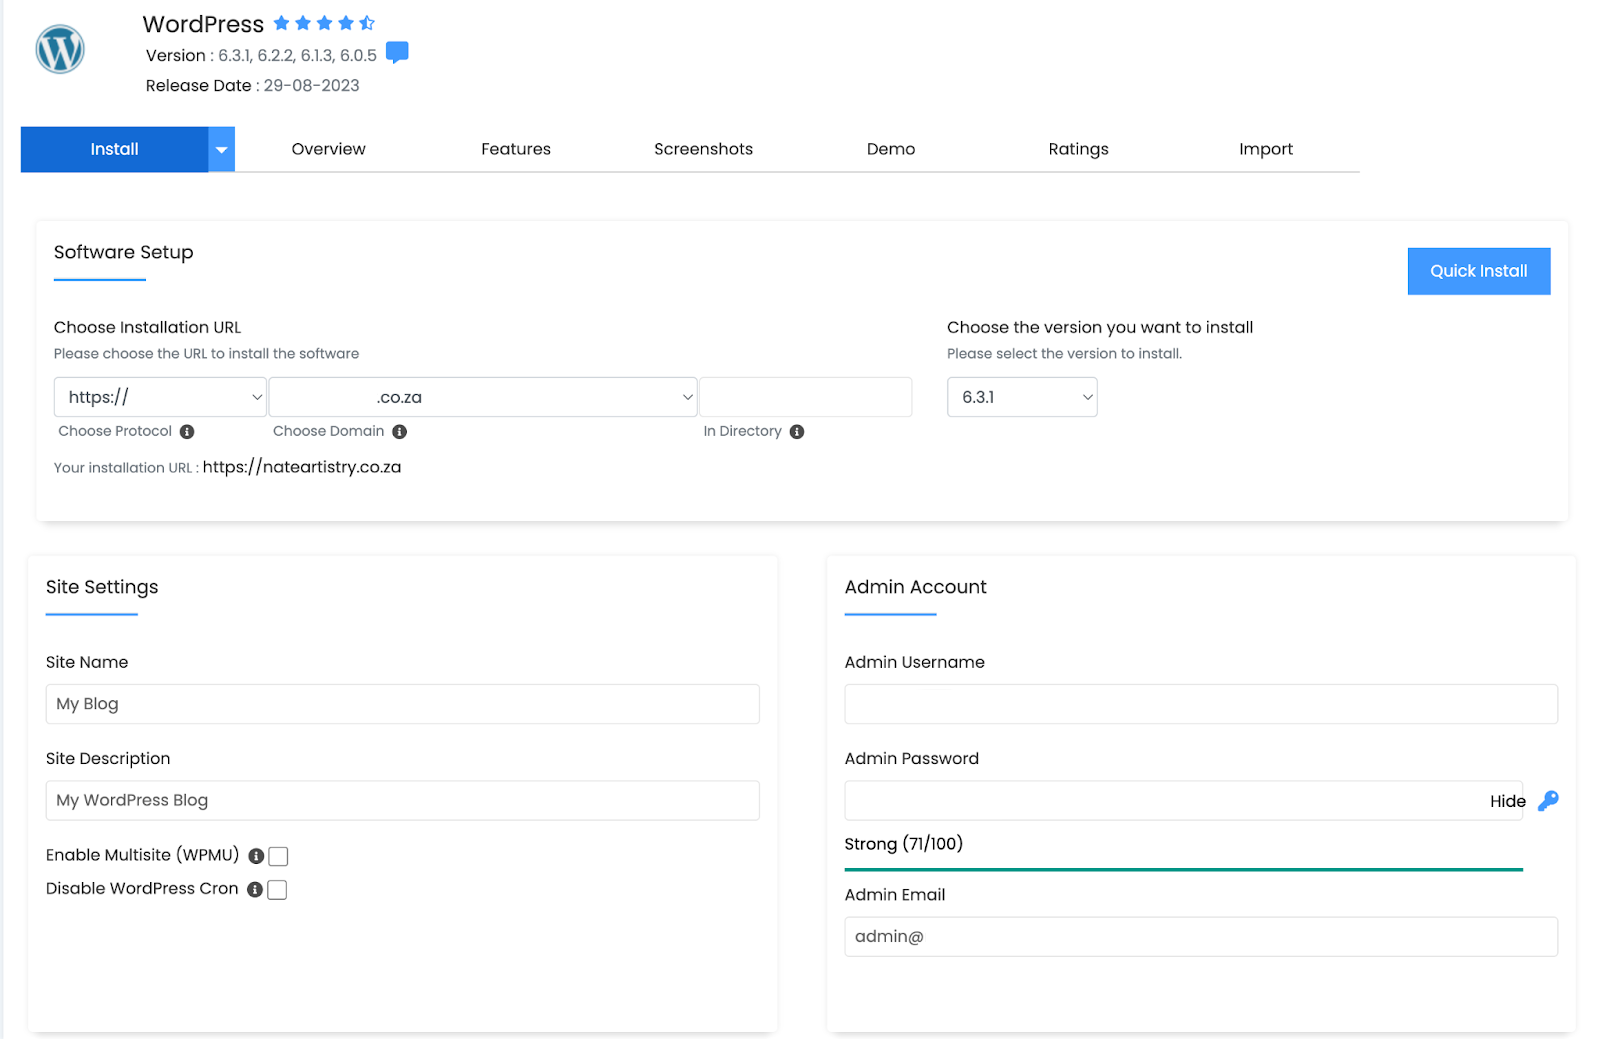
Once you have your active website, click on the website manager in your Client Zone and it should open up cPanel or CWP which has an option for softaculous app installer. Click on the wordpress icon on top to install it.
You can install Wordpress using these steps:
Login into Clientzone, Click on Hosting, Click on the domain, Website Manager, Log in Website Manager, Scroll till you see Softaculous App Installer, Click on WordPress
Remove the /wp at the end when choosing the URL. See the below as an example:
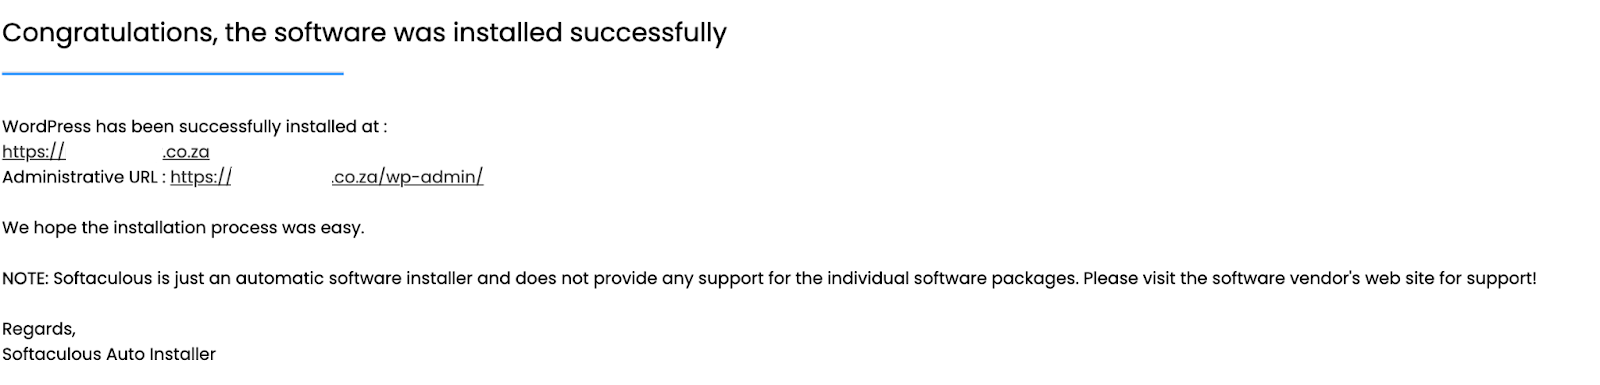
When you’re done installing it will look like this:
Step 3: Install a WordPress E-Commerce Plugin
To build an online store, you'll need to install a WordPress e-commerce plugin. Some popular e-commerce plugins include WooCommerce, Easy Digital Downloads, and WP eCommerce. Once you've chosen an e-commerce plugin, you can install it by going to the "Plugins" section of your WordPress dashboard and clicking "Add New."
One popular e-commerce plugin that can be used in South Africa is WooCommerce. It supports various payment gateways and shipping options that are commonly used in South Africa, such as PayFast and CourierIT.
Setup and Configuration
Go to: WooCommerce > Settings > Payments > Payfast.
Use the toggle under Enabled to select Payfast.
Select Set Up. You are taken to the Payfast settings: Enable/Disable – check the box to enable Payfast as an option on the checkout page.
You will need to create an account with Payfast
But then save changes to activate it.
Save changes.
Step 4: Configure Your E-Commerce Plugin
After installing your e-commerce plugin, you'll need to configure it to fit your needs. This includes setting up payment gateways, shipping options, and tax settings. Depending on the e-commerce plugin you're using, the setup process may vary.
Step 5: Choose a Theme
Once you've configured your e-commerce plugin, you'll need to choose a theme for your online store. There are many free and paid WordPress themes available that are specifically designed for e-commerce websites. Some popular e-commerce themes include Divi, Astra, and Storefront.
Step 6: Customize Your Theme
After choosing a theme, you'll need to customize it to fit your brand and style. This includes adding your logo, changing the color scheme, and creating custom pages. Most WordPress themes have a customization panel that allows you to make these changes easily.
Step 7: Add Products
Once you've customized your theme, you can start adding products to your online store. This includes creating product pages, adding product descriptions, and uploading product images. This is a simple process but can take time as you will be adding images, titles, and pricing. You can use this as reference: https://woocommerce.com/document/managing-products/
Step 8: Launch Your Online Store
After adding your products, you're ready to launch your online store. Make sure to test your website thoroughly before launching to ensure that everything is working properly.
Using cPanel to Install WordPress
cPanel is a popular control panel that many hosting providers use to manage their servers. To install WordPress using cPanel, follow these steps:
- Log in to cPanel
- Click on the "Softaculous Apps Installer" icon
- Click on WordPress and then click "Install Now"
- Fill out the installation form and click "Install"
Using CWP to Install WordPress
CWP (Control Web Panel) is a free control panel that allows you to manage your server and website. To install WordPress using CWP, follow these steps:
- Log in to your CWP account
- Click on the "File Manager" icon
- Navigate to the "public_html" folder and click "Upload"
- Upload the WordPress installation files
- Extract the files and navigate to your website in a web browser
- Follow the installation wizard to complete the installation
By following these steps, you can easily build a basic e-commerce website using WordPress. Good luck with your online store! Should you need any assistance, our team is ready to assist.

Leave a Comment